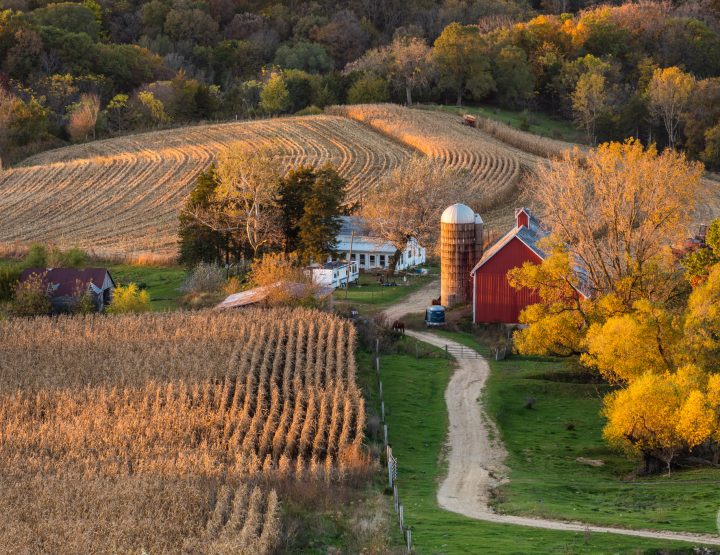
I’ve seen other photographers start doing this and I’ve had many questions about some of my images so I figured now is as good of time as any to get started with doing a “How I Got The Shot” (HIGTS) with some of my work. I made this image on August 7, 2016 somewhere in Clay County on the way up to Okoboji for a family reunion. Many times as I’m driving an opportunity for a photograph unexpectedly presents itself and I have to pull over. There are times when I hesitate and don’t pull over and I usually end up regretting it later on. For this scene though, it begged to be photographed!
Due to the vastness of the scene before me, I knew I was going to have a hard time capturing it in a single frame. And if I did only do a single frame, a) I wouldn’t be able to blow it up as large and b) a wide angle lens diminishes the size of anything in your background, making it look much smaller than it actually appeared. So, my only option was to make a panoramic image.
It’s one thing to whip out your cell phone and make a quick panoramic image in just a few seconds – the technology has come a long ways making this an easy task. However, on a DSLR it’s much more involved. While in the field, it’s very important that you level your camera and/or tripod ballhead when preparing to make a panoramic image otherwise you risk the images not lining up in post processing and everything you shot was a bust.
Once you are level and have confirmed that while starting to rotate your camera it remains level it is ok to proceed in starting to shoot your panoramic images. Everyone has a different strategy for panoramic images but to be safe I shoot the scene with 50% overlaps between consecutive images. So, wherever I start with my first image, the next one I take after panning right is only 50% further into the scene than the previous. What I usually do is find some sort of landmark on the right edge of the frame and then I will put that into the center of my frame for the next shot, repeating this over and over until I have images of everything I want contained in the resulting panoramic image.
This particular image consisted of 7 different individual images stitched together with post processing. Adding to the complexity, each of those 7 images were a 3 bracket sequence (more on that later) so I took 21 images to make just 1 image. I use the Adobe Creative suite for my editing needs with Lightroom and/or Photoshop handling the majority of the heavy lifting.
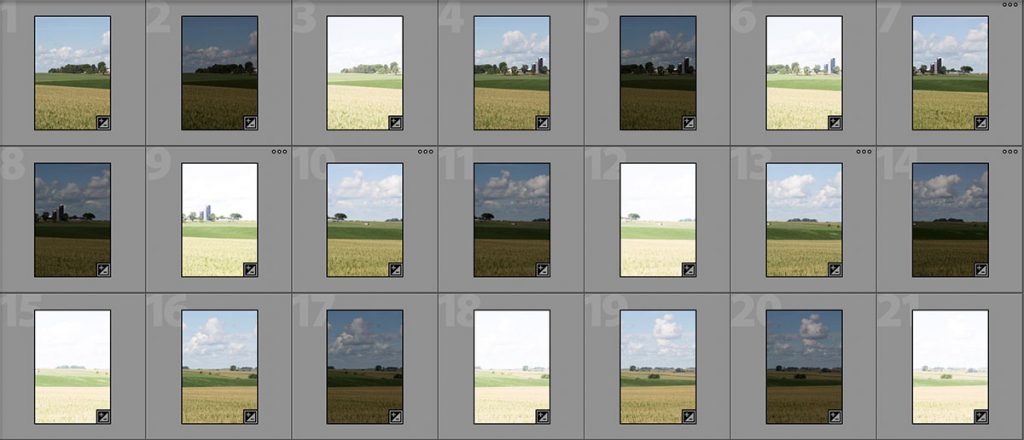
As I mentioned above, each “section” of the panoramic image was a 3 shot bracket. The reason I do this is so that I can ensure I have the widest range of highlights to shadows captured in my images. Our eyes can see this wider range from highlights to shadows whereas our cameras cannot. You may have experienced this while out shooting if you’re trying to capture a beautiful sunset with your camera but when you focus on the sky in order to capture the colors you realize that everything in front of you in the foreground is nearly black. Or, let’s say you have some wildflowers in the foreground that you want to include with the sunset but when focusing on them the camera raises the exposure so that everything in the foreground is properly exposed, thus resulting in a “blown out” sky (appears mostly white and you lose all of your color and detail). So, the best way to overcome this is to shoot a bracketed sequence consisting of a properly exposed shot, a deliberately underexposed shot and a deliberately overexposed shot. This way in post processing you can merge the 3 together (also referred to as HDR photography) to ensure you have the widest range of detail in your image.

Once the HDR merge has been completed on each sequence of 3, you end up with the final 7 images that will ultimately make up the panoramic image. As you can see above, there is approximately 50% overlap between each image to give Adobe Lightroom enough data to work with in it’s panoramic stitching process. If there isn’t enough overlap, then the images will fail to stitch and your panoramic image will be ruined. Also, just to note, since I am sharing screenshots of my editing workflow, you may be wondering why the resulting image looks so much different from the original “negatives” that were shot. I choose to shoot strictly in RAW format (versus the default JPG that most phones and new photographers use with their DSLR’s). A RAW file contains a lot more detail that can be fine-tuned in post-processing and when you initially download these images they appear kind of flat and dull. Once you take them into post-processing and work with the sliders then you start breathing life back into them. If you shoot in JPG only mode, your camera will make those editing decisions for you based on what it thinks is “correct” but I choose to override this feature and shoot in RAW so that I as the photographer can make those creative decisions.
After a successful image stitching with Adobe Lightroom, then I can make my final adjustments to white balance, highlight recovery, shadow recovery, contrast and sharpness and then the image is ready to be exported as a JPG file and shared with the world. I hope you enjoyed this behind the scenes look at “How I Got The Shot” – thanks for reading!


2 Comments