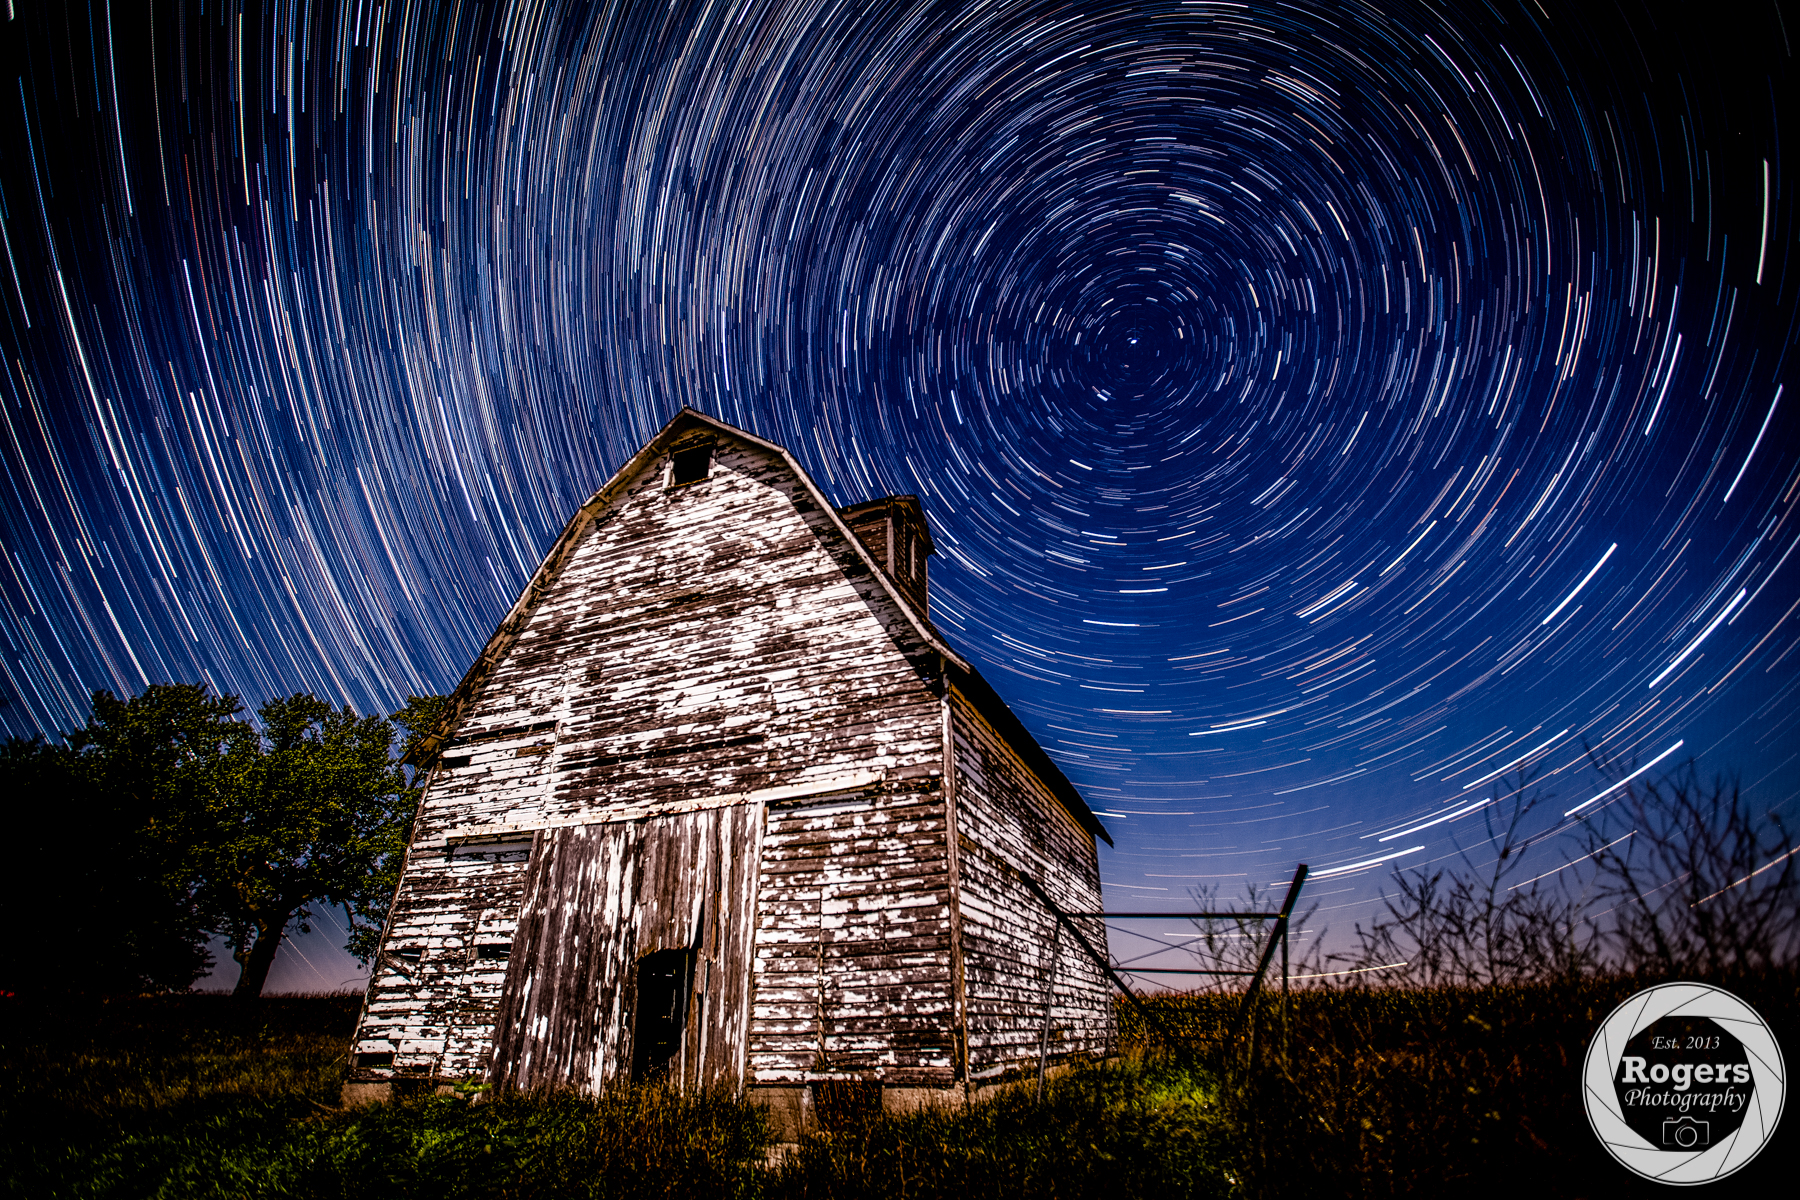
Several people have asked me about my approach in creating the image above so I thought I would share. In all honesty, this was my first attempt at the star trails photography technique and was thrilled with how it turned out. I can’t wait to get out and create some more!
Taking Photos for Star Trails
First of all, let’s talk gear:
- Camera: Canon 5D Mark II
- Lens: Canon EF 16-35mm f/2.8L II USM
- Tripod
- Intervalometer
The tripod and intervalometer are an absolute must. The image above was created over a period of 42 minutes (lens kept fogging over for any period longer!) so keeping the camera perfectly still and taking pictures for that long can’t be done by hand-holding. Focusing a lens at night can be difficult especially when the moon isn’t present (new moon or hasn’t risen yet). The concept of “focusing to infinity” isn’t always a safe bet to ensure stars are in focus at night. The best advice I can give is to switch your camera into Live View mode if you have it and zoom into 10x and look for a bright star on the back of your LCD. Once you find one you will manually focus on that star until it shows crisp on the LCD. You want to make sure the star isn’t a blob or has any halos because that means you are out of focus. Keep your lens on manual focus and even tape it down so you don’t risk bumping it and ruining your images (everything is more difficult to operate at night!).
Once I had my spot chosen and settings dialed in I took the first picture of the sequence. The moon was quite bright which cast the light on the barn but earlier in the night while taking other photos I would turn on the flashlight on my iPhone to bounce some light on subjects in the foreground. This is a technique called light painting which I would’ve used in this situation had the moon not been so bright. Definitely check that out if you’re looking for other things to do for night photography.
Camera settings:
- Aperture: f/2.8
- Shutter Speed: 30 seconds
- ISO: 2000
- Intervalometer Delay: 1 second (a 30 second exposure with 1 second between so roughly 2 photos per minute)
Processing Photos for Star Trails
Once the photos have been shot and downloaded to your computer, the next step I took was to apply some basic exposure/highlight/shadow edits to all 84 photos using Adobe Lightroom (do not apply sharpening until the end). One point I’d like to make is if you’re a photographer and aren’t shooting in RAW or don’t know what that is I highly recommend learning. Shooting in camera RAW has been revolutionary in taking my photos to the next level. Don’t wait any longer in making the switch now as you’re able to recover so much more detail in post processing.
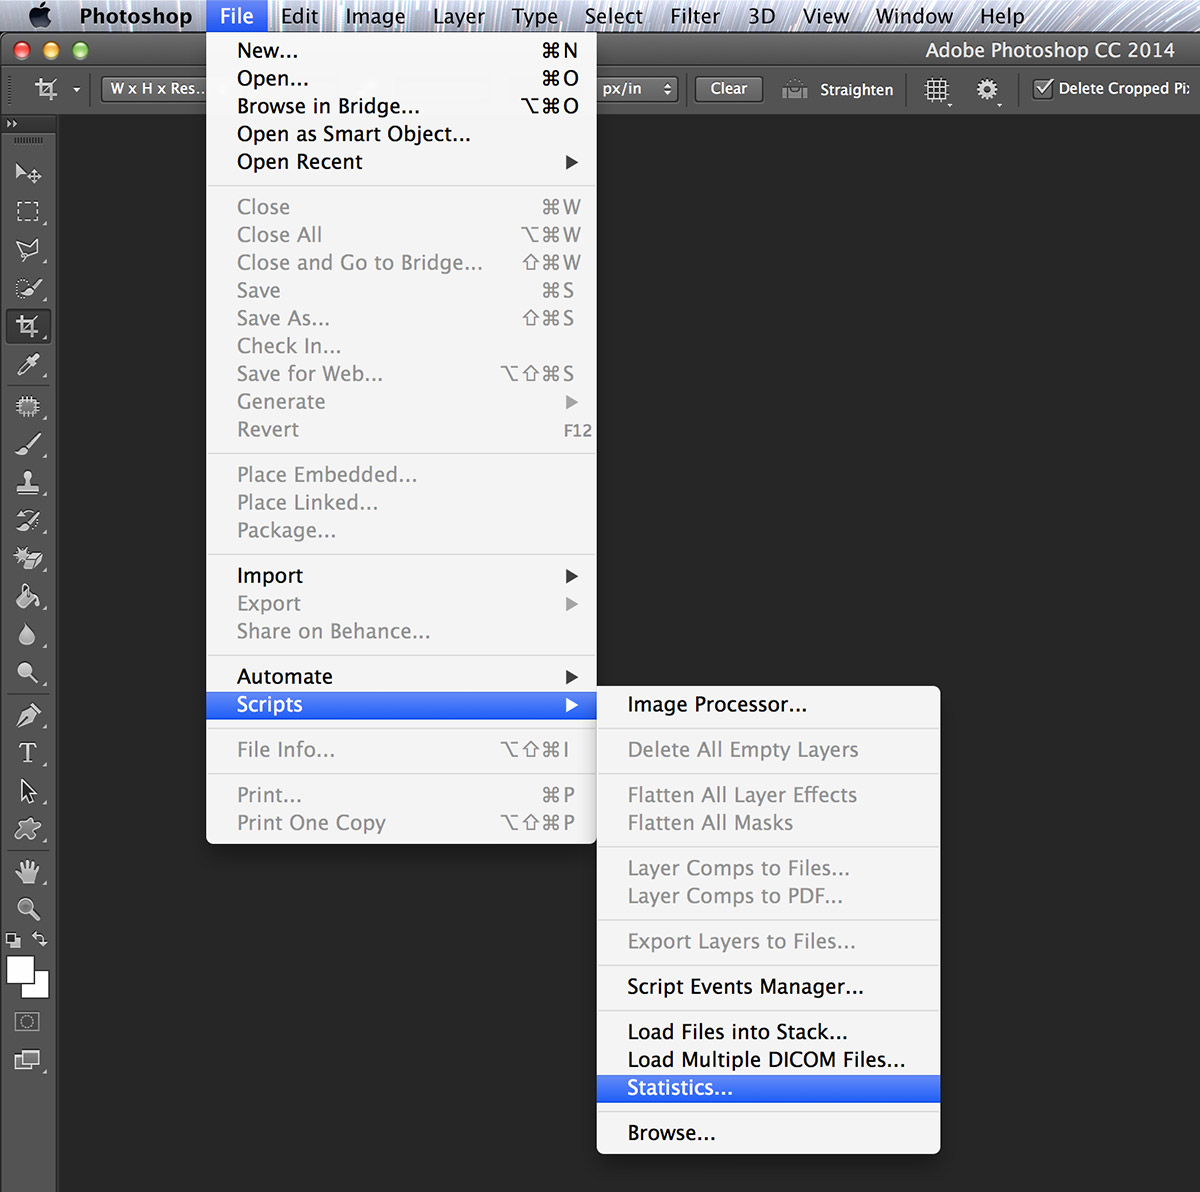 Once the edits have been made I then opened Adobe Photoshop CC and went to File -> Scripts -> Statistics. When the window for Image Statistics opens, you will want to select the following options:
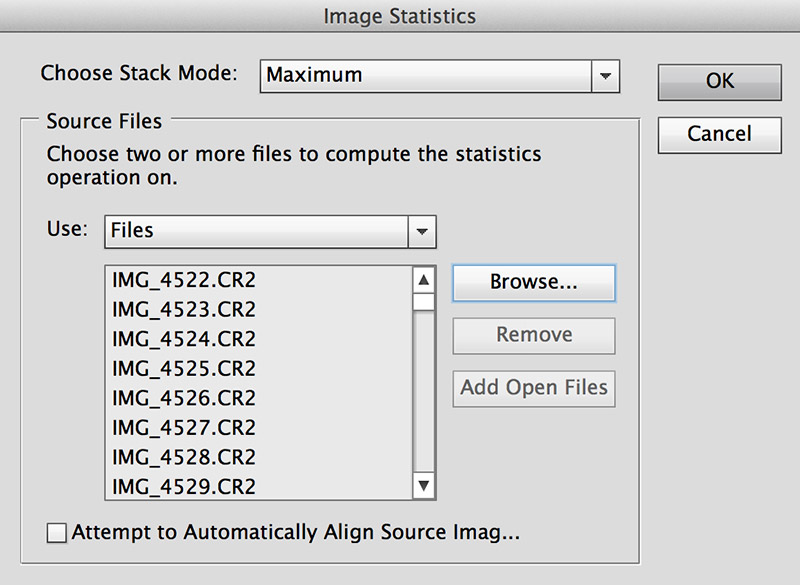
- Choose Stack Mode: Maximum
- Use: Files
You will want to Browse for the location on your hard drive where the RAW files (or JPGs if using them) are located and select them.
 Once the images are loaded into view press OK and sit back and relax. This part takes some major computer processing and depending on how fast your computer is and how many pictures you’re stacking together this could take 15 minutes or way longer. When Photoshop has finally completed stacking the images, you will be left with a Smart Object in your layers panel.
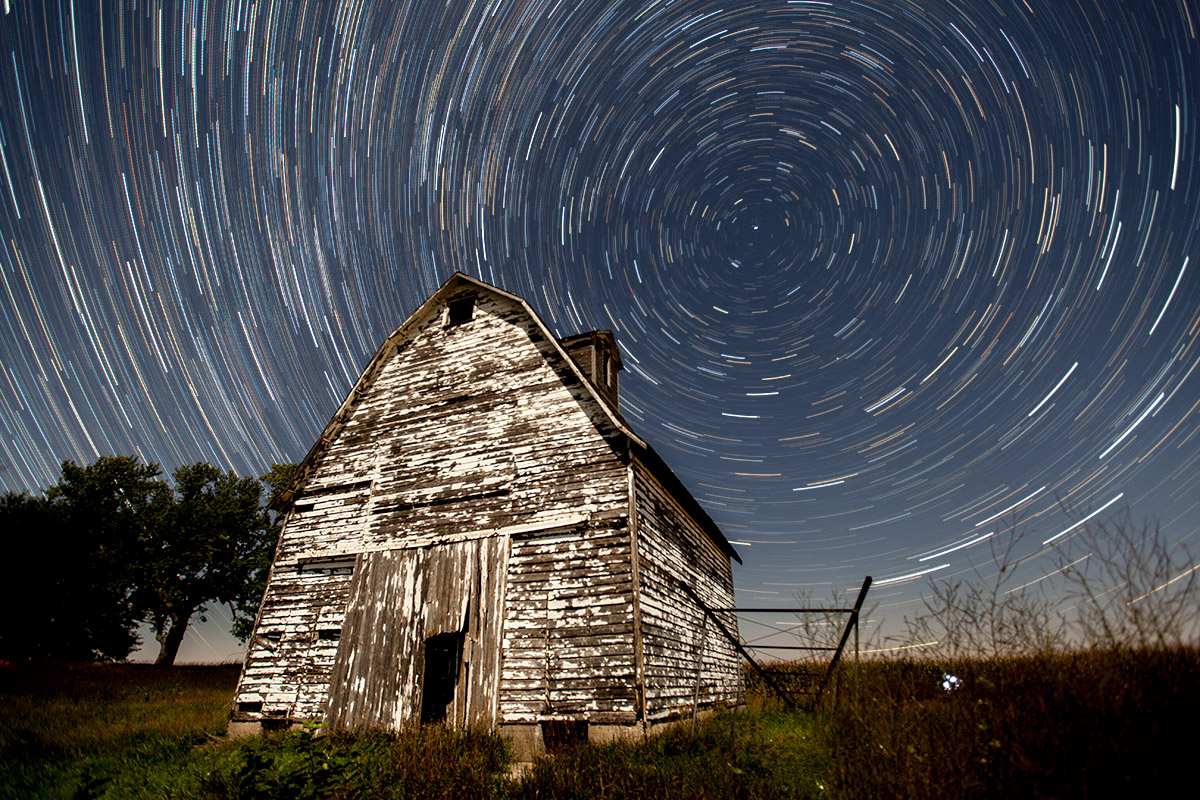
I suggest double clicking on the smart object to expand and show each of the layers (84 in my case) so that you can go through and make minor adjustments to any blemishes that entered the frame during a shot. The image below is how mine turned out after the stacking. It’s hard to tell from this small of an image, but there are several satellites and airplanes that cruised through the sky during that 42 minute period. You will notice those straight streaks running through your star trails and you will want to clean that up. You an also see there is some light to the right of the barn. A friend of mine was photographing the barn on the opposite side and his head lamp was captured a few times. But fear not – these are easy to remove without ruining the picture.
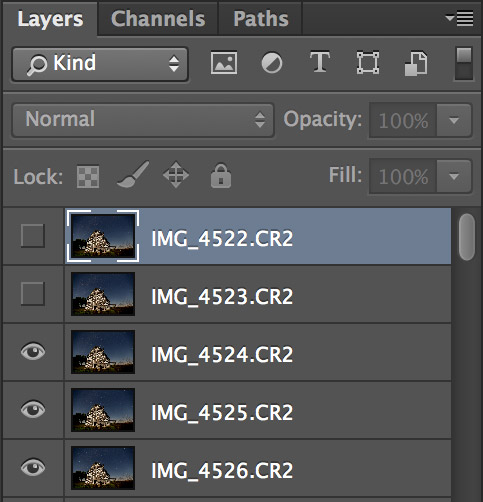 What you need to do now that the Smart Object has been expanded into individual layers is to edit out blemishes from a specific image by drilling down to that specific layer. I recommend going down the list of layers and pressing the “eyeball” next to each layer to show/hide that layer.
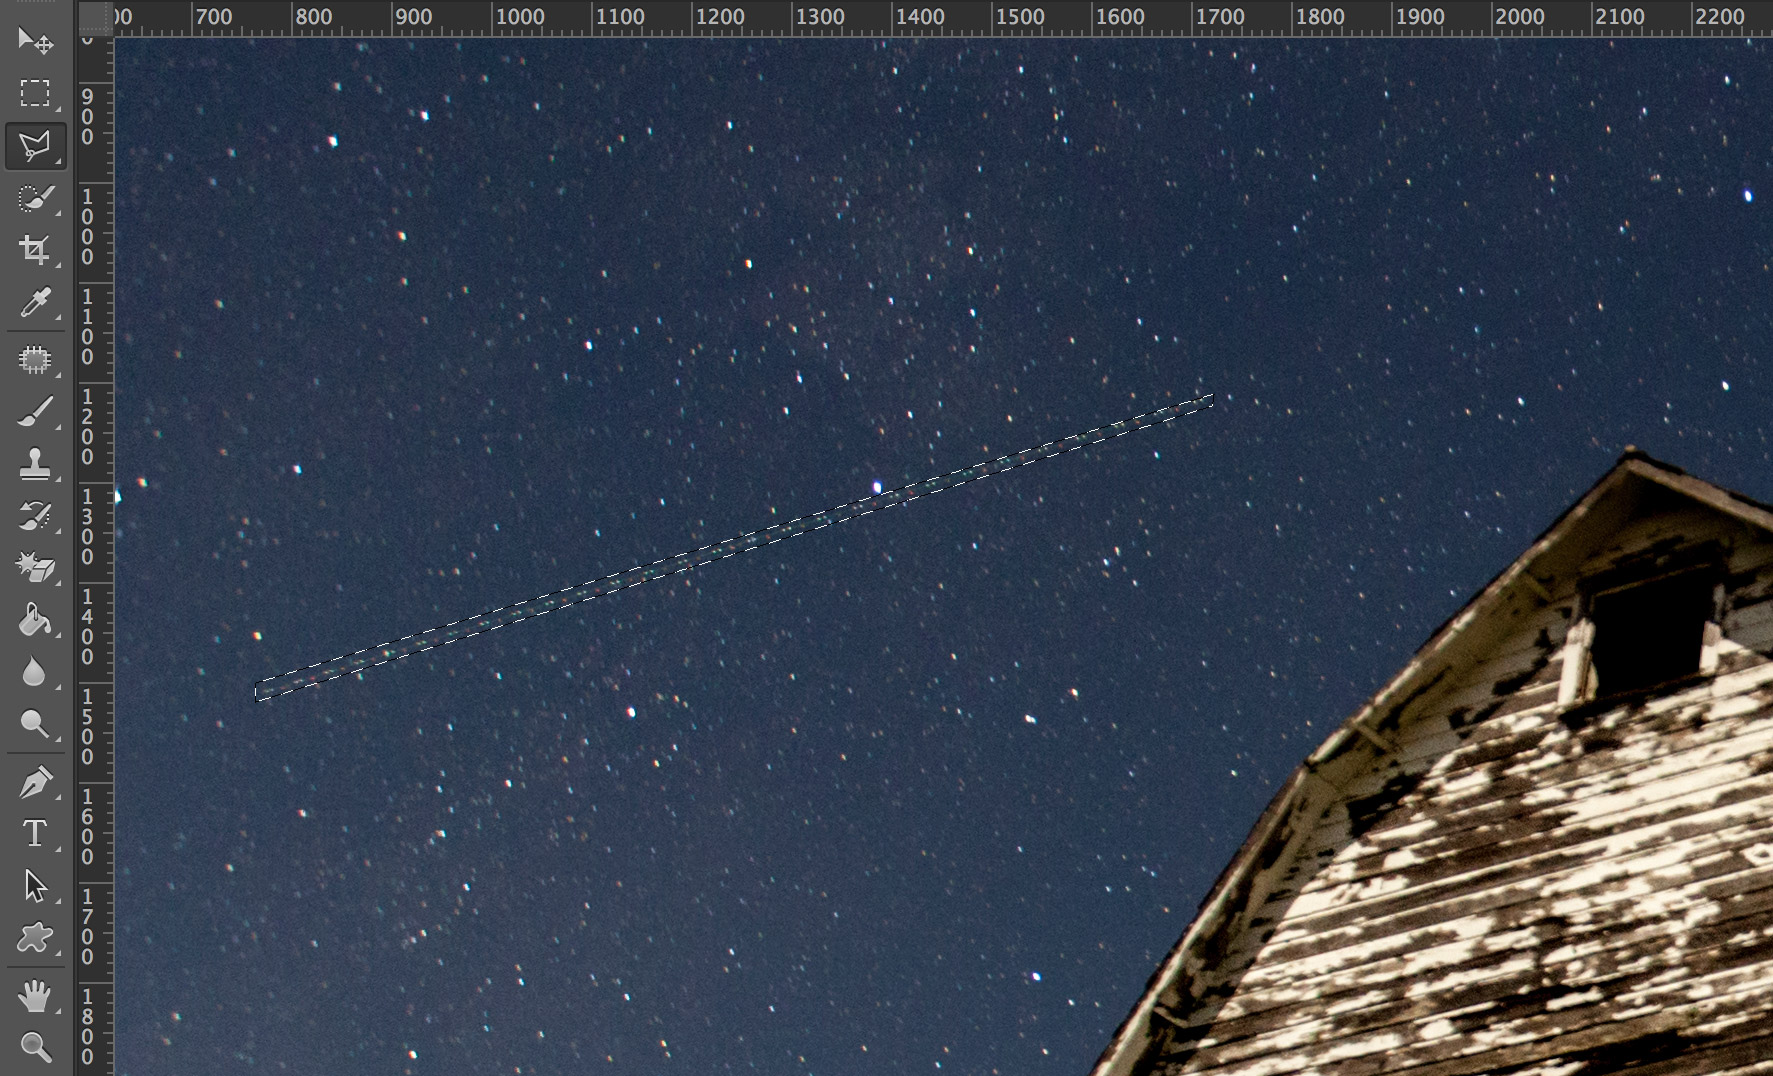
While doing this, look for things to appear that are not supposed to be in the shot such as a streak from an airplane or satellite, a headlamp from your friend on the other side of the barn, or even break lights appearing on the barn as we sat in the car to warm up (oops!). Use one of the selection tools to encompass the area you want to get rid of and simply delete it on that layer to remove it from the overall stacked image. When removing airplanes and satellites be sure to select as little of the actual stars as possible as to not interfere with the star trail streaks.
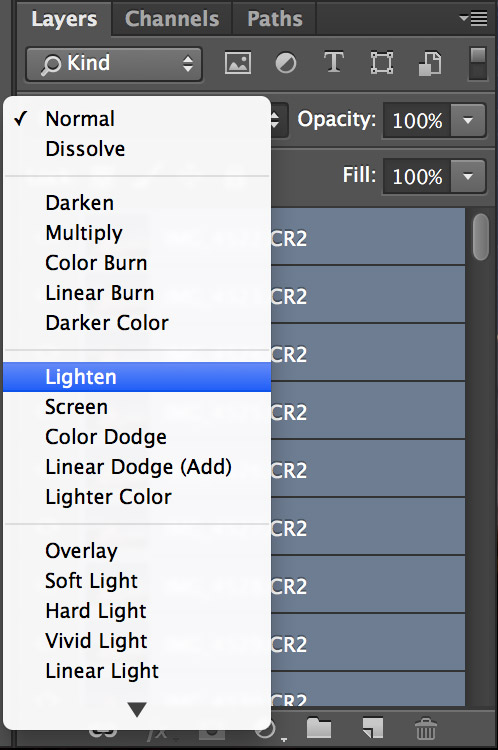 Once you are finished inspecting all of the individual layers it’s time to show all layers again to see the final edited image. You will have to highlight all of the layers and then go to your Blending Mode in your Layers panel and choose “Lighten”. What this does is analyzes each pixel of the stacked layers in the photograph and lets the lightest color from a layer at that pixel shine through the rest. One last note I will add is not to apply any sharpening until this final step. I added sharpening the first time I processed this batch of images in Lightroom before stacking in Photoshop but it ruined the curves of the star trails by making them look too rigid. I would recommend saving out to a high resolution JPG and then importing into Lightroom to make any final adjustments for sharpening, adding your watermark, etc.
I hope this article helps someone create their own star trail images as it’s a lot easier than this long article lets on. To recap:
- Take the images
- Import into Lightroom (or any other editing program) to make basic exposure/highlight/shadow edits
- Import into Photoshop using the Statistics stacking function
- Edit the individual layers to remove any blemishes from airplanes, satellites, car headlights/brakelights, etc
- Flatten layers to save as JPG
Thanks for reading! Feel free to ask any questions in the comments or to share your own images you’ve created.